Ok ok, I know, it's been too long, and for what this blog entry isabout...WAY TOO LONG... but what the hell,gotta get on with it at some point. No, this entry is devoted to my favorite food, and my favorite was of cooking it: Turkey roasted over an open fire.
Now for me, this whole tradition started during a project for the California Biennial of 2008 we did in our backyard with Bay Area artist Julio Cesar Morales and his collaborator Max La Riviere-Hedrick. For the project Julio and Max made a video about the last 8 hours of when California was still Mexico.. all of which took place over a dinner in Sonoma - so NorCal!
Anyway, we ended up roasting an 80lb steamship round of a Wagyu Beef to make Tacos....decadent and then some. Anyway, this got me interested in rustic forms of cooking, and as a result Max & the gang helped meput on a Thanksgiving dinner at our home for 30 members of the Bay Area art community. We all sat at one table, lit by candles, drank wine, and ate the most fabulous fire-roasted turkey the world has ever known!"ROASTED OVER AN OPEN FIRE!" you say, "But won't that make a dry bird even worse?!?!?!" The answer is no no no...there's magic in the whole technique and it comes in the form of brine!

Brine is a relatively easy task:
Bring everything to a boil, turn off the heat, and let it steep until it's cool... or cool enough it wouldn't harm a baby bathing in it... cause that's exactly what this Turkey is and what it's going to do. Next you'll place your turkey - cleaned of course - in a brine bag ( or clear and sterile heavy duty trash bag ) and pour your brine in. Squeeze as much air out of the bag as possible, tie it up and keep this bird-in-a-bag cool.... I do this by putting it in a cooler with some ice on the bottom and leave it outside. Be sure you secure the top or the neighborhood cats are going to have a way better Thanksgiving than you will. The math is 1lb = 1 hour of soaking time... more time if you want your turkey a little saltier.
The next day you'll have to prepare your bird. Since th
is is an outdoor adventure, I use the garden hose to clean off the surface of the bird. Now for the magic: Trussing! This is a bit of a trick, but there are plenty of books and online tutorials that will show you how to do this. There are 3 secrets to this when doing this for open fire cooking:

1) Use natural rope. Natural rope is naturally flame resistant, and it won't release any nasty chemicals on your bird like nylon would.... I haven't tried nylon, and I pity the gut of the person who has.
2) Make sure you have an area both at the neck and at the rump where you'll be able to hook into the hanging chain. You're going to need to flip this bird half way through.
3) Make that Bird chill! No seriously, bend that birds wings behind its neck like it's hanging on Baker Beach. This will allow for a more even roast when you put it over the fire.
Gear!: You will need a couple things to accomplish this feat successfully.
1) A good fire pit. In the past we've always used Kiln brick. However, you could use regular brick, but it's more likely to break down at a faster rate than your fire brick, and i'm not sure it will insulate and radiate heat as well. Here's a picture of the foundation for the cooking pit I built with my buddy the-soon-to-be-legendary Art Historian Samuel Johnson. He may sit around Harvard and whine about Sartre, but give that boy a trowel and he can lay some brick!

2) A roasting rack. Ironically my buddy Bird helped me by welding up a sweet rack to roast...well..my bird. This was a simple cross beam structure with a loop at the bottom to secure chain. I've use fancier and more ghetto versions.... your call, but might as well make it fancy... it gives you something to talk about while your drinking by the fire
3) A cast-iron pot. This is extremely important for two reasons a) it will catch all the drippings and prevent a flame up under your turkey and there by scorching the skin, and b) this will evenly radiate heat upwards as conduction will be good in this bit, but radiation will certainly be essential. This doesn't have to be too fancy of a pot since it's going to take a real beating... but if you've got an extra Le Creuset to throw in a fire why not? It'll be a lot easier to clean up afterwards.
4) A meat thermometer: I've used an analog one in the past, but for the price, you really should use digital.
5) and perhaps most importantly... WOOD! Wood is going to be a choice decision that will largely be determined by location. In the Bay Area we were blessed with a plethora of options ( surprise surprise ) but kept away from anything overly aromatic i.e. Eucalyptus. We used almond because of it's ability to impart a "sweet" flavor to the meat, and in Banff, Canada, we used Spruce. Both woods had their issues: Almond was nice, but didn't seem to throw a nice heat / Spruce gave off way too much flame and would just burn up so that I was feeding the fire constantly. The Cadillac of woods was found in Far West Texas: MESQUITE! Mesquite cooks like a dream: hot coals that burn forever, a beautiful scent, and of course the most amazing smoke flavor you could ever impart on the skin of a turkey. In the end, try to get a hard wood, and one that's going to taste good.

The rest is relatively simple. Use a couple of bricks in the center to create a base for your pot. Build a good fire over them, and once they're down to a solid bed of coals, place your pot over them. String up your turkey on the rack and hang it to a height over the fire that you can hold your hand over for about 5 seconds. Of course, you're going to keep an eye on this bird, and you can raise it up or down depending on how quickly or slowly it's browning. Because this isn't a rotisserie you're going to have to flip this bird half way through. A 14 lb bird takes about 6 hours to roast, so 3 hours in, take the bird off, lay it on a clean surface, and re-tie it on the other side. Roast that bird until it's about 170ºF or 76ºC and then pull it off the fire.
VOILA!

Now we've done this several times: Bay Area, Banff, Marfa, but it has always been a pot-luck for artists. Our Than
ksgiving in Banff was especially productive as we did a ceramics workshop for the dinner. Participants in the Polymath Breakthrough residency - led by none other than the illustrious Joseph Del Pesco - were invited to make their own diner ware for the feast. ( The lovely Kristina Lee Podesva fashions the cup for her Thanksgiving dinner.)
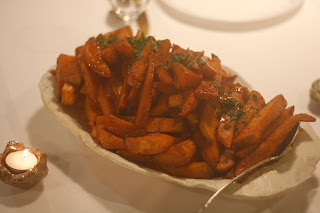
(Ceramic plate with roasted yams made by one of the participants)
In many ways I feel that the art community I find myself in has been some of the most supportive family I could have ever imagined, and I cherish every moment I have with them. As a result, I can think of no better holiday to re-appropriate than the one that let's me tell the ones I love how thankful I am to have them in my life with food!
NOW FOR SOME PICTURES!

The roasting set up at our former home in the Bay Area

Turkey roasting in front of the Salt Kiln in Banff

Dinner in the Bay Area

Dinner in Banff, Canada at the Banff Center